Update System version
Important steps: Backup your all files & Database and : On the Update case, there are 2 things in your hosting need to be carefully:
* .env is DB information file
* All php files in your hosting
* Database: in this version there are many things is changed,If the update process is successful, all the old data will be preserved, but in case of unwanted events, you need to backup your db as well.
🚀 How to Upgrade BookingCore to Version 4.0.0
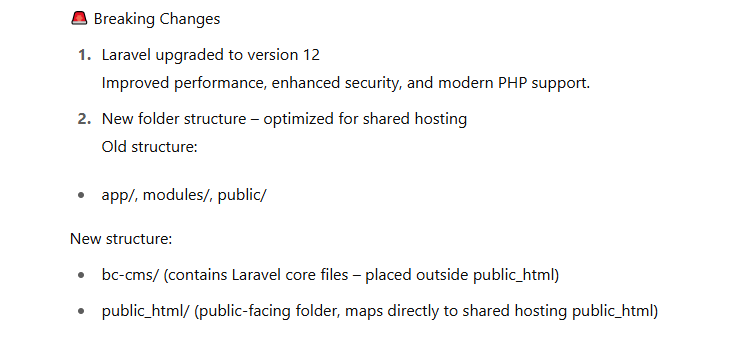
⚠️ Note: This version is a major update. The folder structure has been changed, so the update process is more complex than before. Please follow these steps carefully.
Step 1: Upgrade PHP Version
- Make sure your server is running PHP 8.2.
- If you're using localhost, you may need to restart your local server after upgrading PHP.
Step 2: Backup Important Files from the Old BookingCore Folder (Usually public_html)
Navigate to your current BookingCore directory and back up the following:
- .env file
- storage/installed file
- public/uploads folder
Step 3: Remove Old Code
Inside the BookingCore directory (commonly public_html), delete all existing files and folders.
Step 4: Upload the New Version
Unzip the bookingcore400.zip package and upload the new version to your hosting server.
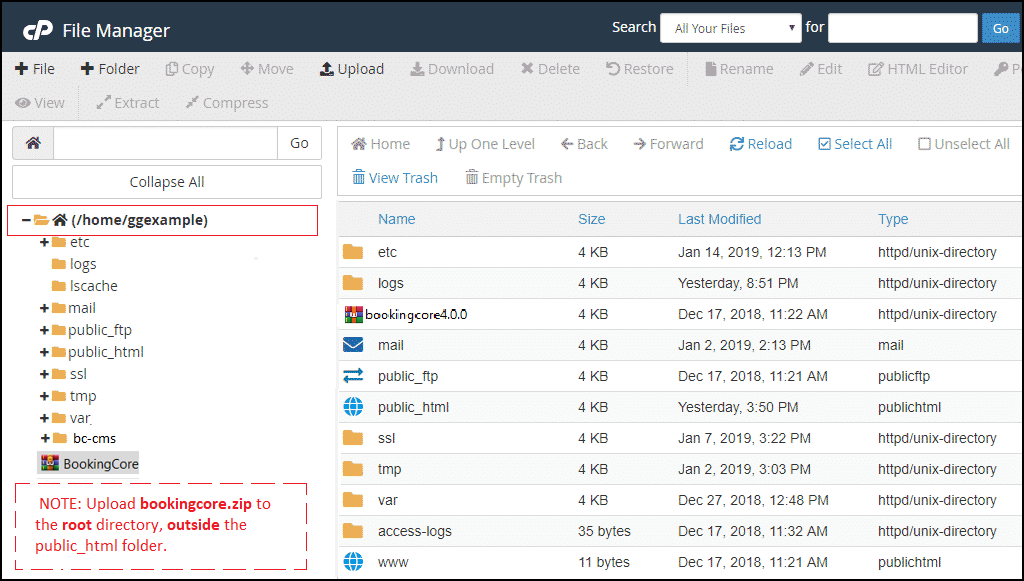
Step 5: Restore Your Backup
Copy the backup files and folders into the new structure as follows:
- .env → move into the
bc-cmsfolder - public/uploads (from old version) → move into the new
public_html/uploadsfolder - storage/installed → move into
bc-cms/storage/installed
Step 6: Finish the Update
Once everything is in place, go to your website URL and reload the page. The system should now be running on BookingCore version 4.0.0.
📌 Additional Notes
- This update restructures the codebase and directories, which is why manual actions are required.
- If you encounter a blank page or server error, make sure your
.envfile is correctly configured, and permissions are set properly. - Clear your browser cache and refresh after completing the upgrade.
📌Need Help? Contact our support team if you get stuck during the upgrade process.
Was this article helpful?